[ad_1]
Last Edited:
Please click or tap the links below to jump to different sections:
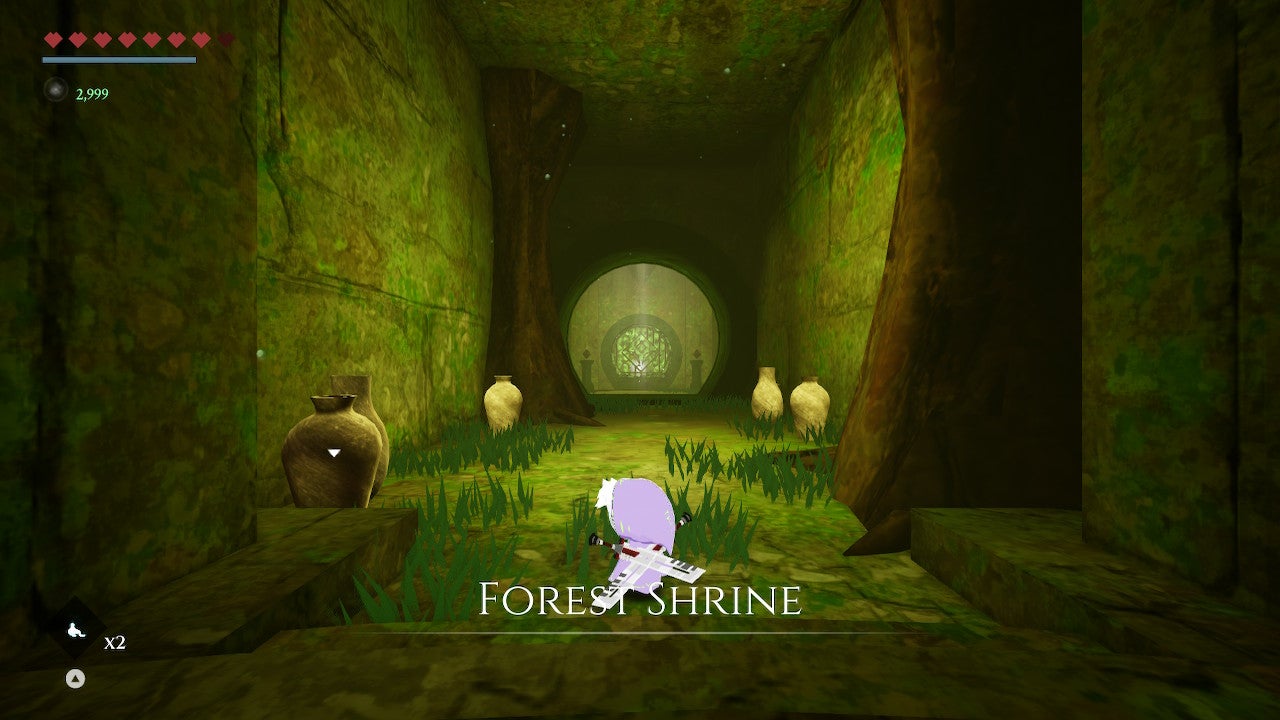
Destroy the Forest’s Corruption
When you arrive, walk forward and a cutscene will begin. Nuos, who we’ve met before, will explain that his power is dimming in the shrine. Nuos mentions a powerful gauntlet within the shrine. The gauntlet is a set of Claws that are called Nuos’ Claws. Our goal is to find these and destroy the shadows overpowering Nuos’ soul.
Where to Find the Old Key
The first place we need to go is to the right if you’re facing the iron gate. In here, destroy the three enemies — they don’t do anything other than a small AEO explosion of leaves occasionally. Destroy all the pots in the room for Ore after this and then open the chest in the corner (to the left of the stairs) after that to get a Ruby Ore.
Head inside the tree after this and interact with the lever to change the water level.
After this, go back to the center of the shrine and head into the left area. Ignore the enemies and drop down the ladder. Make your way across to the other side and you’ll see two chests.
Open them for a Ruby Ore and an Old Key.
Where to Find the Second Old Key
After this, head back up the ladder that we took to get here and then go back to the room where we first lowered the water level. Drop down the hole in the center of this room and get ready to dash so that you can land on the platform pictured below before dropping all the way down.
Hit the switch here. This opens a gate to another section of the shrine. Ignore that for now. Drop down and head toward the large, circular locked door. Use the Old Key on this door to open it.
Head inside and go down the stairs. You’ll see a chest with a Red Ore inside to the right of the stairs. From here, head right through the only open doorway in here and a cutscene will begin. Two enemies will spawn in: one is the flying one we fought earlier and the other is a swordsmen. He will either slash once in a wide angle or thrust attack twice, one right after the other.
Take these enemies out and a chest will appear. Open it to receive the Old Key.
Where to Find the Holy Key
Head back into the room you were just in and walk across. Use this Old Key to open the locked, circular door. Another set of enemies will appear. Both are swordsmen. Take them out and another chest will spawn.
Inside is the Holy Key item that will open the final locked door in the room with the locked, circular doors.
Where to Find Nuos’ Claws
After acquiring the Holy Key, head back into the circular room with the three doorways. Use the Holy Keys to open the only door that is still locked. Inside, you’ll find a chest to open.
Open the chest to receive Nuos’ Claws. These give you the ability to walk and jump on walls.
Where to Find the Forest Guardian Spirit
From here, head back toward the center of the shrine except now, go through the gate we unlocked with the switch earlier. Take out the flying enemy in here and jump to the room on the right. Take out the two swordsmen in here and then look up. You should see what we see below:
You’ll need to jump from wall to wall all the way up to reach the switch up high. It’s quite difficult and you’ll need to be fast about it. Once up here, hit the switch. This opens the locked gate in the center of the Forest Shrine.
In here, you’ll find the Forest Guardian spirit. Interact with it to trap it.
You can equip this spirit to your character next time you’re at a shrine. The Forest Guardian spirit increase your movement speed.
After this, head back into the center and if you’re facing the entrance, go through the doorway on the right. In here, use your new wall run ability to cross the gap. On the other side is the lever pictured below: pull it to change the water level again.
From here, drop down using the ladder on the other side. You’ll see another ladder that you can now take down with the water level lowered. If you look down, you’ll see what we see below: a chest.
Jump down to that chest. You’ll find a Ruby Ore inside the chest down here. Head through the door way behind you and you’ll reach the next void of the game: Arigo’s Challenge.
When you begin this void puzzle, walk forward until you reach the first of 30 orbs.
Jump onto the first breakable platform, then onto the permanent platform, and finally onto and off of the final two breakable platforms. You should have five orbs at this point and you should have the same view as us below:
From here, jump onto the platform moving up and down and then use it to reach the upper ledge. You’ll need to jump from wall to wall, grabbing the orbs along the way, until you reach the top. There will be four orbs to your right and an orb across the way in front of a chest with a Void Ore inside.
From here, look to the left and you’ll see some platforms down below. Jump out and dash over to them. Move forward and you’ll end up with the view we have below:
Jump from breakable square to breakable square, making sure to grab each orb along the way, and then you’ll be on staircase leading to the end of the void.
Where to Find the Silver Blades
After completing that void, look at the void statue and then turn 180 degrees. Head through the doorway and you’ll see walls on either side of a large gap.
You need to jump up and dash to the wall. Then wall-run to the middle platform. Defeat the enemy here and then jump directly to the wall — DO NOT DASH YET — and when you reach the end of the wall via wall-run, dash to the doorway.
There are two of the swordsmen we’ve been fighting in this shrine in this large room.
Take them out and then make a circle around the room, making sure to destroy any pots in here for Ore. Be sure to open the two chests in here as well for a Ruby Ore and the Silver Blades weapon.
Door Switch
At the chest where you obtain the Silver Blades, you’ll see the stone pillar we’re on top of in the screenshot below.
From here, you’ll need to jump in between the two moss-covered pillars and wall-run back and forth until you’re high enough to dash over to the platform with the switch on it.
Once you hit the switch, you’ll need to be fast. Continue to wall run on those two pillars we just launched off of until you’re on top of them. Then, look to the right and you’ll see a platform. Jump over to it.
Jump across the gap to the other platform and then drop down to the platform below that was previously unreachable.
Walk around the corner until you see a piece of shadow jutting out and blocking your way forward.
Just to the left and dash slightly forward and to the right to land on a platform behind the shadow. Quickly wall run and dash-jump over the enemy here. You can take it out if you want, but you’ll likely need to re-run this path afterwards. From there, you should have landed on the circular platform around the perimeter of the tree. Follow it around to another enemy.
Jump over them onto the platform attached to the wall and then wall run on the wall to your left. You’ll need to jump from this wall to the wall on the right. Dash from this wall to the door that’s open thanks to the switch we just hit and you’ll be where we are below:
Open the chest here to get a Ruby Ore.
Where to Find the Third Old Key
Head forward and make your way to the platform next to the flying enemy. They’ll shoot our green rings you need to dodge by jumping over the rings. Jump to the pillar on the left and wall-run until you can jump to the platform attached to the wall where a switch resides. Hit this switch to open the doorway further in this area.
Head back to the platform where we just were and jump-dash over to the wall on the right. Jump from this wall to platform with the doorway and head inside. Open the chest in here to obtain the Old Key.
Wave Emote
If you’re looking at the stairs that lead to the Old Key above, you should spot an Emote statue to the right of the stairs.
Interact with it and pay 200 Ore to receive the Wave Emote.
If you’ve been following this guide, you already have the Hello Emote. Walk over to the white square on the ground to the left of the doorway. Use the Hello Emote while standing on it.
A cutscene will reveal that a new chest has spawned in the Forest Shrine. It’s near the beginning — from the center area of the shrine at its start, go into the room on the left. Go down the ladder and then you’ll see the chest on the opposite side.
Open it to receive an Apple item.
Where to Find the Second Holy Key
When you’re ready to proceed deeper into the shrine, head back to the area preceeding the third old key. Remember that giant tree with a locked gate in front of it? Remember how there was a fancy chest behind it? The Old Key we’ve acquired opens that gate.
Open the chest to receive a Holy Key.
Now, on the opposite side of the tree is a stairway. Head up the small set of stairs and follow the path to reach a door that can only be opened with a Holy Key.
Open the door.
Boss Fight: Gruh the Corrupted Guardian
Gruh is the first formal boss fight of Blue Fire. They use the same move over and over, but in differing ways. Gruh, as you’ll see, is a giant plant. The only move they’ll do is a ground slam with their four arms that causes a green ring to shoot out. You must dodge this ring by jumping over it.
- Before using its green ring move, Gruh will aim its arms up into the air and let out a screech.
- Pay attention: if it’s a short screech, it will only shoot one or two green rings out when it pounds the ground. If it’s a long screech, it will be three or four rings.
- If Gruh does what appears to be two screeches in a row, or a 3-4 second screech, it is about to pound the ground five times, which means you’ll need to dodge five of the green rings.
- The best way to dodge the green rings is by jumping, but when there are more than two rings, it can be hard to time your jumps — using your dash is essentially another way to jump, or at least in this case, another way to dodge the green rings. You’ll need to use a combination of jumps and dashes to avoid getting hit by the green ring.
- Your time to attack happens in between the spouts of green rings. You will only be able to get two melee attacks completed before Gruh begins to screech again, which will knock you back.
- Try to use your magical abilities to either block the green ring with your shield or damage Gruh with your fire magic.
- Gruh will go down after about 10 melee hits and half a dozen magic hits so be sure to use a combination of all of your combative skills to take them out.
After defeating Gruh, walk forward into the new area and you’ll meet Nuos in all of their godly form. It turns out he’s the God of Knowledge. Nuos will give you the Uthas Temple Key, which is the game’s water temple.
This concludes the Destroy the Forest’s Corruption Main Quest and begins the Find the Uthas Temple Main Quest.
When you’re ready to move on, it’s time to find the Uthas Temple. Head to the next page of this guide to continue this walkthrough.
[ad_2]