[ad_1]
For Derek Wolf, cooking over an open flame is an art form. When he thinks about campfire cooking, his mind doesn’t go to roasting a hot dog on a stick or tossing some foil-wrapped taters into the coals. Instead, he dreams up dishes like spicy rotisserie beef ribs with grilled bacon-wrapped asparagus, coal-roasted lobster tails with cowboy broiled cheesy broccoli, and al pastor skewered tacos with charred and glazed pineapple. Think campground eats can’t be gourmet? Wolf’s recipes will change your mind.
Wolf is the mastermind behind the Over the Fire Cooking blog (as well as its Instagram account, which has attracted 1.8 million followers for its flame-kissed food porn) and author of the cookbook Food by Fire, so it’s fair to say he knows a thing or two about making a masterful campfire meal. We recently talked with him to get his tips and tricks for cooking an elevated outdoor feast. Read on for his advice (and a tasty recipe, too).
1. Build a Log Cabin-Style Fire
When building a fire, do you arrange your logs in a teepee or stack them into a log cabin? If you ask Wolf, he’d say both have their pros. The teepee is good for creating high heat at one centralized point (the top of the teepee), and it’s ideal for boiling water. For your meal, however, opt for the log cabin. This style of fire generates heat in a wide, even plane—better for heating up a skillet or grill.
To build one, place your fire starter in the fire pit, light it, and then add two logs in parallel on either side, says Wolf. Then add two more logs—perpendicular and on top of the first two logs—to form a square around your fire starter. Keep stacking in this alternating order until you reach your desired height.
“I typically do about four stories,” Wolf tells Men’s Journal.
As the fire burns, the layers of logs will break down, but you can stack more logs to keep it going. If done properly, the fire should last for hours.
2. Wait for Coals
Generally speaking, you don’t want to put your food on the fire the moment it’s lit. At first, the flame won’t produce consistent heat, and you’ll run the risk of burning your meal. Instead, get the fire going and give it time to burn down to coals, says Wolf.
“A good fire can take anywhere from 30 to 45 minutes to break down and get to where you’d like it temperature-wise for cooking,” he says.
While the fire grows, use that time to do meal prep. If you’re cooking meat, be sure to take it out of the fridge or cooler and let it warm to room temperature. This will help it cook evenly.
3. Consider the Type of Heat You Need
There are two ways to cook over fire: directly and indirectly. Direct-heat cooking means you’ll place your food right over the heat source: Using skewers, cooking on coals, or grilling over the flames with a grate. This method exposes your food to high-intensity heat, and it’s good for searing and foods that don’t need a long time to cook.
The indirect method places food near or around fire and uses radiant heat to cook it. This is common practice for barbecue. Indirect heat is great for preventing flare ups (grease and fat won’t drip into the flames), breaking down really fatty meats, or cooking delicate protein (i.e. chicken). It also creates a beautiful exterior crust.
4. Keep Your Fire Consistent
Keeping your fire’s temperature steady is key to cooking your food just right. But that’s easier said than done. One trick Wolf recommends is the “hand test.”
“A good hand test tells you the temperature based on the time you can hold your hand near the fire,” he says.
Here’s how to do it. Once your fire is going, hold your hand six to eight inches away from the flames. The amount of time you can hold your hand near the fire roughly tells you how hot it’s burning. If you can hold it there for up to three seconds or less, the blaze is generating high heat. Medium-high heat is around four to five seconds, medium is six to eight, medium-low is eight to 10, and low is 10 to 12. If you can hold your hand near the fire for longer than 12 seconds, it’s not hot enough for cooking.
5. Check Your Food’s Temperature
The last thing you want to do is undercook your chicken and risk food poisoning or overcook a choice steak. The best way to avoid those scenarios, says Wolf, is to use a meat thermometer. To use it, insert the thermometer’s tip at the deepest point on your cut of meat, making sure not to touch any bones. Chicken should be cooked to 165 degrees, pork and fish to 145 degrees, and ground meat should be over 160 degrees, for example.
6. Be Aware of Carry-Over Cooking
Many people make the mistake of cooking their meat all the way until it hits the ideal internal temperature. That’s a problem because the food continues to cook even after it’s off the fire, a process known as carryover cooking.
“This results in it being overcooked,” Wolf explains.
Instead, pull the meat off the heat a bit before it reaches the desired internal temperature. When cooking a steak, for example, take the meat off the fire when it hits 120 degrees and let it rest—it’ll reach medium-rare (125 degrees) on its own. It’s a good idea to let meat rest for about half the time it was cooked, Wolf says.
7. Tools of the Trade
One of the best parts of campfire cooking is its simplicity—no ovens or fancy stoves, just wood, flames, and food. That said, Wolf does recommend a few gear items to make the job a little easier.
He likes the lightweight Breeo Outpost grill for cooking in the backcountry, and the X Series fire pit is a great option for the backyard. He prefers a natural fire starter and matches to build his fires—you want your food to taste smoky, not like lighter fluid, he says—and welding gloves can be helpful for maneuvering logs without getting burned. Finally, you’ll need a meat thermometer as well as a sharp knife and a cutting board for prepping your food.
Wondering what to cook? Wolf recommends the recipe below as a good place to start. Of course, you can also check out Over the Fire Cooking for even more fire-ready meal inspo.
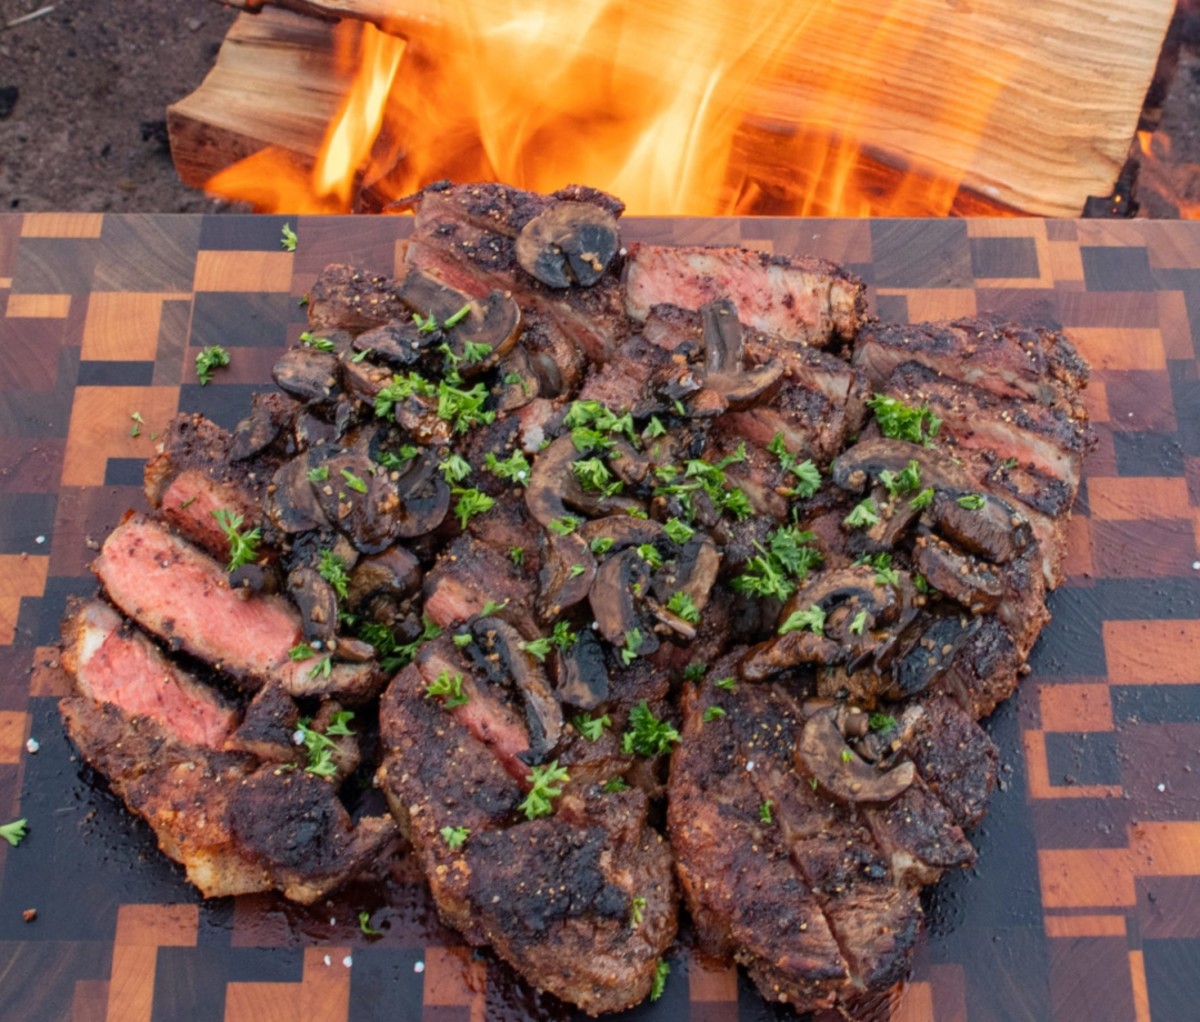
New York Strip Steaks with Bourbon Mushrooms Courtesy Image
New York Strip Steaks with Bourbon Mushrooms
Equipment:
- Cast-iron skillet
- Tongs
- Knife
- Cutting board
Ingredients for the Steaks:
- 3-4 New York strip steaks
- 1.5 tbsp sea salt
- 1 tbsp black pepper
- 2 tsp garlic powder
- 2 tsp chipotle powder
- 1 tsp canola oil
- Chopped parsley for garnish
Ingredients for the Bourbon Mushrooms:
- 1 cup shiitake mushrooms
- 2 oz bourbon
- 2 tbsp beef broth
- 1 tbsp minced garlic
- 1 tbsp brown sugar
- 2 tsp Worcestershire sauce
How to Make It:
- Rub steaks with oil. In a bowl, mix together salt, pepper, garlic, and chipotle powder. Season steaks thoroughly and set aside for 30-40 minutes in the fridge or cooler to dry brine. About 10 minutes before cooking, pull the steaks out and let them come to room temperature.
- Build a medium-high heat fire for direct cooking. Add some canola oil to the cast-iron skillet and place skillet above the fire 2 minutes before cooking.
- Add steaks to skillet, cap side down, and cook for 1 minute to render the fat. Then, place the steaks flat to cook for about 2-3 minutes per side, until they reach a 120-degree internal temperature. Then pull them off skillet and let rest for 10 minutes.
- Add mushrooms to skillet and cook out the water (about 4 minutes). Once they are golden brown, deglaze the skillet with bourbon and let simmer for 1 minute. Next, add the rest of the ingredients for the bourbon mushrooms and let simmer for 3-4 minutes, or until reduced. Once done, pull the mushrooms off the heat and set aside.
- Slice steaks, top with the mushrooms, and garnish with chopped parsley.
For access to exclusive gear videos, celebrity interviews, and more, subscribe on YouTube!
[ad_2]