[ad_1]
Last Edited:
How to Build Portals
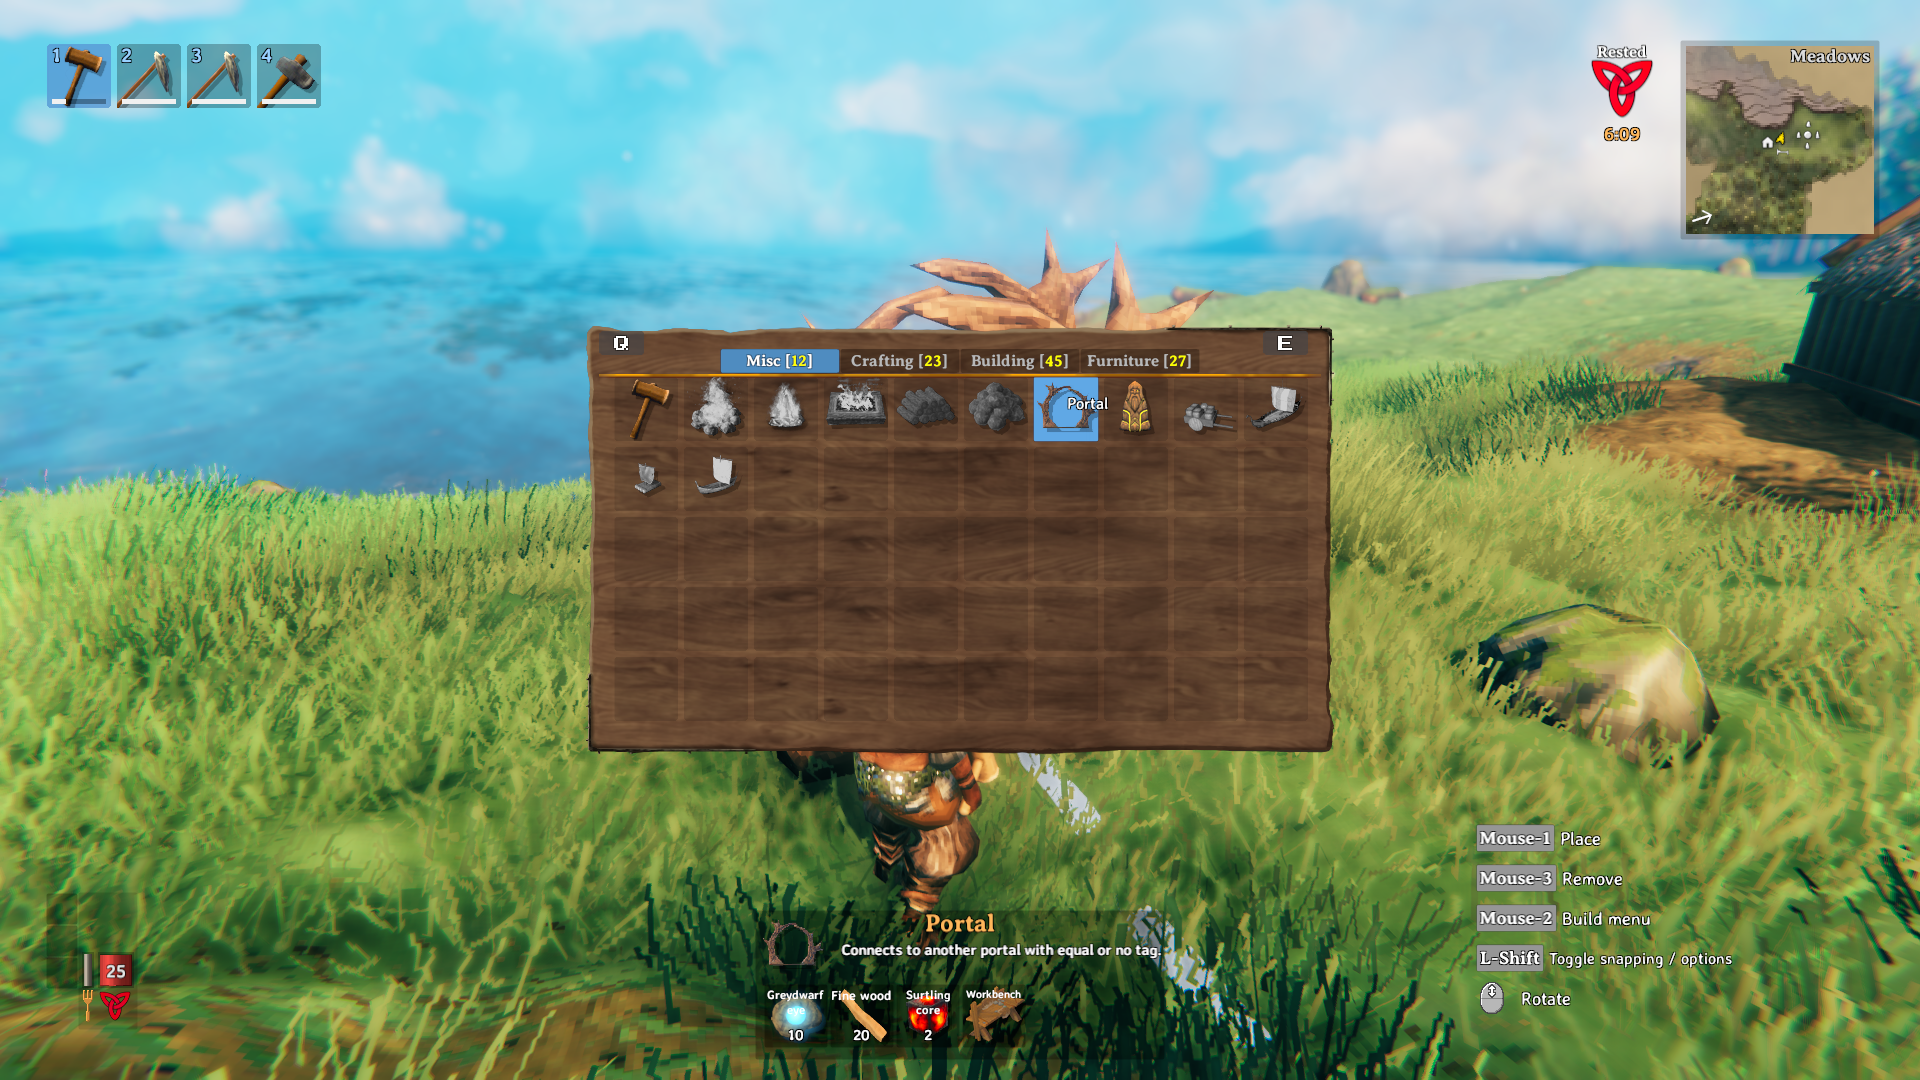
Portals can be acquired surprisingly early, which is helpful as you begin exploring the world. You’ll need three ingredients to craft a portal:
- 10 Greydwarf eye
- 20 Fine wood
- 2 Surtling core
Keep in mind, you’ll need two portals to teleport, so make sure to double the recipe to take full advantage of it. It also needs to be in range of a Workbench. You can build a new Workbench and place your portal near it to function properly.
Greydwarf eyes can easily be acquired by killing any of the Greydwarf types. Fine wood requires a Bronze axe and can be found by chopping Birch or Oak trees.
Surtling cores are most commonly found in Burial Chambers within the Black Forest biome. These underground dungeons can be difficult, so bring some gear and make sure you’ve eaten. Check out our guide below for more help:
After you’ve acquired the prerequisite materials, equip your Hammer and open your building menu. You’ll find portals under the miscellaneous tab.
Select the portal and place it on the ground within range of your Workbench. You’ll receive a message from the raven telling you that you need to place a second one in order to use it.
Once you’ve found a suitable location for your second portal, place a Workbench, cover it, and build your second portal within its vicinity.
If this is your first set of portals, they will be automatically linked together and usable immediately. Simply walk through the portal as it begins to glow and you’ll be taken back to your original spot.
Note: Certain heavy items cannot be transported through a portal. This includes items like Iron, Copper, Bronze, etc. These items are indicated by a small red ‘X’ in the top right corner of the inventory icon. If you try and walk through a portal holding any of these items you’ll see the message “An item prevents you from teleporting.” You’ll need to drop these items before using the portal.
How to Connect Portals Using the Portal Naming System
If you’re going to use multiple portals to get around, you’ll need to understand the portal naming system. By default, the first two portals you place are linked together.
Subsequent portals will need to be named using a tag system. To change a portal’s tag, simply walk up to it and press E before typing in the desired name.
Note: Portal tags are case-sensitive.
Any two portals sharing the same name will automatically be connected after a few moments, as indicated by the messaging after your chosen tag. If there’s any issue, the tag will read “[UNCONNECTED]” to indicate the error.
And with that, you’re ready to travel more efficiently. Now you’re thinking with portals!
[ad_2]